Introduction
A crimping tool is an essential piece of equipment for anyone working with wires, cables, or connectors. Whether you are a DIY enthusiast, an electrician, or a network installer, understanding the types, uses, and tips for using a crimping tool can make your projects safer, faster, and more efficient.
What is a Crimping Tool?
A crimping tool is a hand-held device designed to join two pieces of metal or wire by deforming one or both of them to hold the other. Unlike soldering, crimping creates a mechanical and electrical connection without heat. This makes it a preferred choice for quick, reliable connections in electronics, networking, and electrical work.
Types of Crimping Tools
There are several types of crimping tools designed for specific tasks:
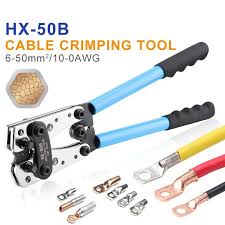
1. Electrical Crimping Tools
Used for connecting electrical wires to terminals or connectors. They ensure a secure and safe electrical connection that can handle current efficiently.
2. Networking Crimping Tools
These tools are specially designed for creating Ethernet cables (RJ45, RJ11). They can cut, strip, and crimp connectors all in one go.
3. Hydraulic Crimping Tools
Used for heavy-duty applications like large cables in industrial settings. Hydraulic crimpers provide more force with less manual effort.
4. Insulated vs Non-Insulated Crimping Tools
Insulated crimping tools are safer for working with live wires, while non-insulated tools are generally lighter and used for tasks where insulation isn’t a concern.
Benefits of Using a Crimping Tool
- Secure Connections: Crimping ensures a firm connection that doesn’t loosen over time.
- Time-Efficient: Faster than soldering, especially for repetitive tasks.
- Versatility: Can be used on a wide range of materials including wires, connectors, and hoses.
- No Heat Required: Safer for sensitive electronics and reduces the risk of damage.
How to Use a Crimping Tool Properly
- Choose the Right Connector: Match the connector size to your wire gauge.
- Strip the Wire: Remove the insulation tool crimping without cutting the wire strands.
- Insert the Wire: Insert the wire which was just severed into the connector.
- Crimp: Squeeze the tool firmly until the connector is securely attached.
- Check the Connection: Tug lightly to ensure it’s strong and stable.
Tips for Maintaining Your Crimping Tool
- Clean Regularly: Remove debris or oxidation to keep jaws precise.
- Lubricate: moving parts to guarantee flawless operation and to avoid rust.
- Inspect Jaws: Check for wear to avoid weak crimps.
- Store Correctly: For greatest longevity, store in a dry location.
Common Mistakes to Avoid
- Using the wrong connector size
- Over-crimping or under-crimping
- Skipping wire stripping
- Applying the tool at an angle
Final Thoughts
A crimping tool is more than just a piece of hardware—it’s a time-saving and reliable solution for anyone working with wires or cables. Investing in a high-quality crimping tool and learning proper techniques can elevate your projects, reduce failures, and improve safety.
For the Information: Click Here
Leave a Reply